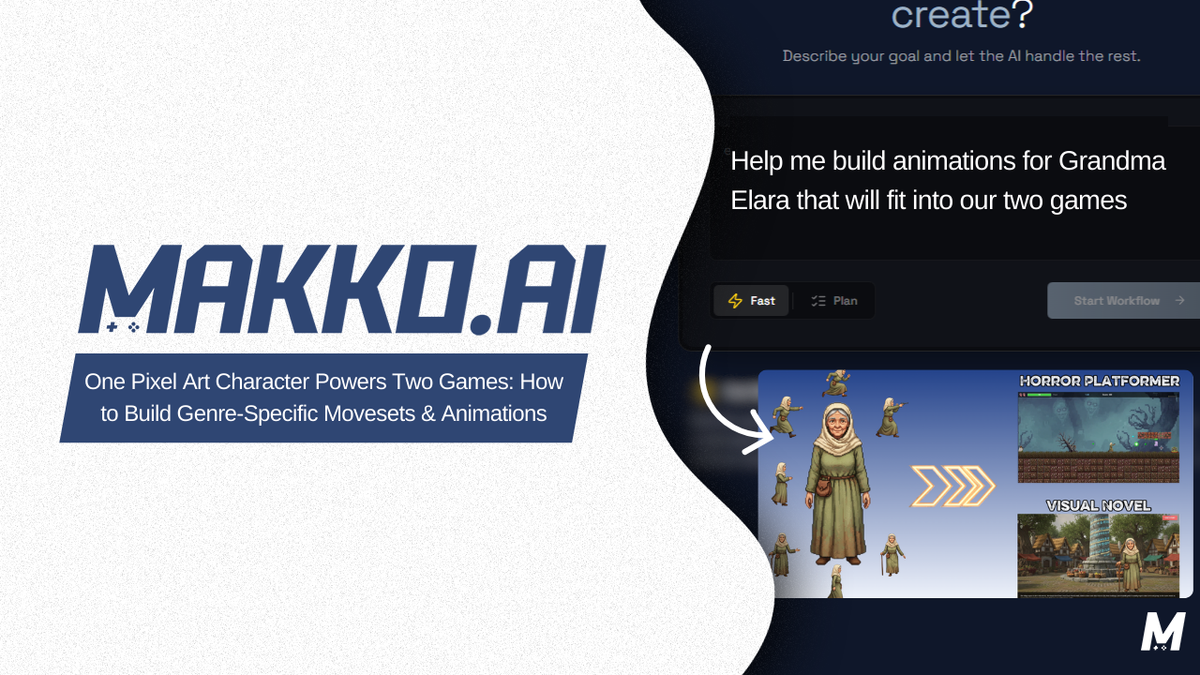
One Pixel Art Character Powers Two Games: How to Build Genre-Specific Movesets and Animations
A single pixel art character deployed across two completely different games — a horror platformer and a visual novel. How to build genre-specific movesets, clean sprite animation frames, and organize manifests so each game's build stays clean.

A character that looks good but cannot move is a prop, not a player. The visual design: the silhouette, the color palette, the art style, defines how a character looks. The animations define what it can do. And what a character needs to do depends entirely on the game it lives in. Building one that can move starts with a solid AI character generator workflow that produces consistent art before animation begins.
A character in a horror platformer needs punchy, responsive animations: a run that feels fast, a jump that has weight, an idle stance that communicates readiness. The same character in a visual novel needs something completely different: a walk that reads as deliberate, a gesture that communicates emotion, a forward-facing pose that holds up during extended dialogue sequences.
These are not small differences in animation style. They are different behavioral layers built for different genres. Building them correctly means understanding what each game actually requires from the character, and then creating pixel art animations and sprite sheets that deliver that behavior cleanly.
This pixel art tutorial walks through how to build genre-specific movesets in Makko's Art Studio: using a single base character deployed across two completely different games as the working example. You will see how the same asset pipeline produces both a platformer moveset and a visual novel moveset, and how Makko's manifest system keeps each game's build clean and separate.
If you are new to how Art Studio and manifests fit into the broader Makko workflow, read How to Add Animated Characters to a Game Using Makko first. This article builds on that foundation. For an overview of how game development with AI uses one character across two different games, that article covers the manifest system from a higher level.
The video below shows the complete workflow in real time. Follow along or use the written sections below as a reference while you build.
What the Action Layer Actually Is
Before opening Art Studio, it helps to understand what you are building and why it matters for gameplay.
Every playable character in a game exists in a set of states: idle, walking, running, jumping, attacking, falling. Each state has a corresponding animation. The game's logic watches for input and game conditions, transitions the character between states, and renders the correct animation for each one. This is the animation state system, and the sprite animations you build in Art Studio are what populate it.
If an animation feels wrong: too slow for the pace of the game, too long before it loops, missing a key pose, the gameplay will feel wrong even if the logic is perfectly correct. A platformer character with a floaty run feels unresponsive even if the movement speed in the code is fast. A visual novel character with a stiff, mechanical gesture feels disconnected from the dialogue even if the writing is strong.
This is why building genre-specific animations is not just an aesthetic decision. It is a gameplay decision. The action layer you build in Art Studio is the layer that makes the character feel alive, or does not.
The Two-Game Setup: One Character, Two Behavioral Profiles
The example throughout this guide uses Grandma Elara: a single base character deployed across two games with entirely different genre requirements: a horror platformer and a visual novel.
For the horror platformer, Grandma Elara needs four animations: a running jump, a run, an idle, and a shooter stance. These are motion-based and physically expressive. The character is constantly in action, dodging and moving through a world that demands responsiveness.
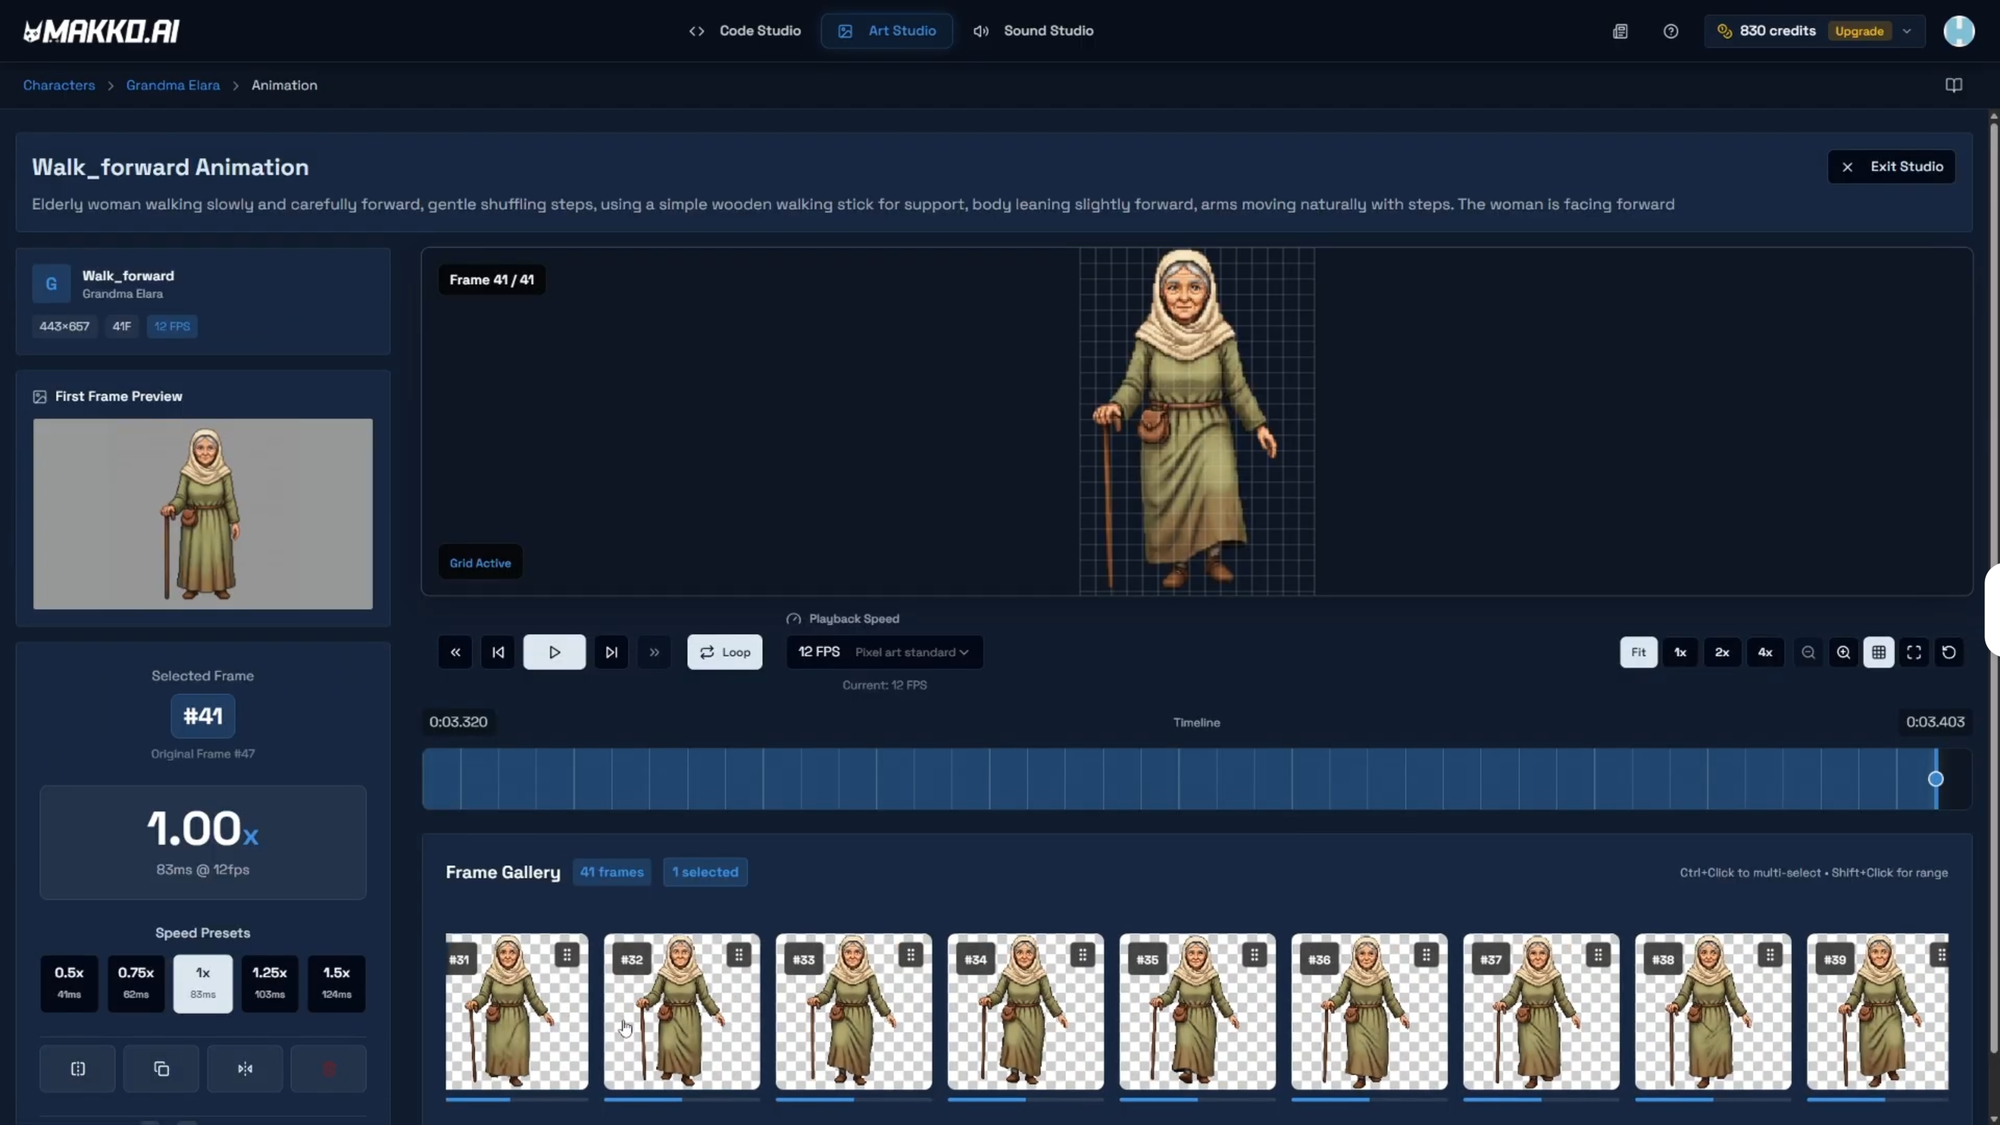
For the visual novel, the same character needs three completely different animations: walking forward, talking and gesturing, and walking sideways. These are slower, more expressive, and oriented toward the player. Two of the three face directly forward, which is the standard convention for visual novel characters during dialogue.
All seven animations are created on the same base character in Art Studio. The separation between games happens at the manifest level: each game gets its own manifest containing only the animations it needs. This keeps each build clean and prevents the platformer's shooter stance from appearing in the visual novel's asset library.
The principle is asset hygiene: create all animations once on the base character, then attach them selectively to the game profiles that require them. It is more efficient than maintaining separate character files per game, and it makes future updates significantly easier to manage.
Building the Horror Platformer Moveset
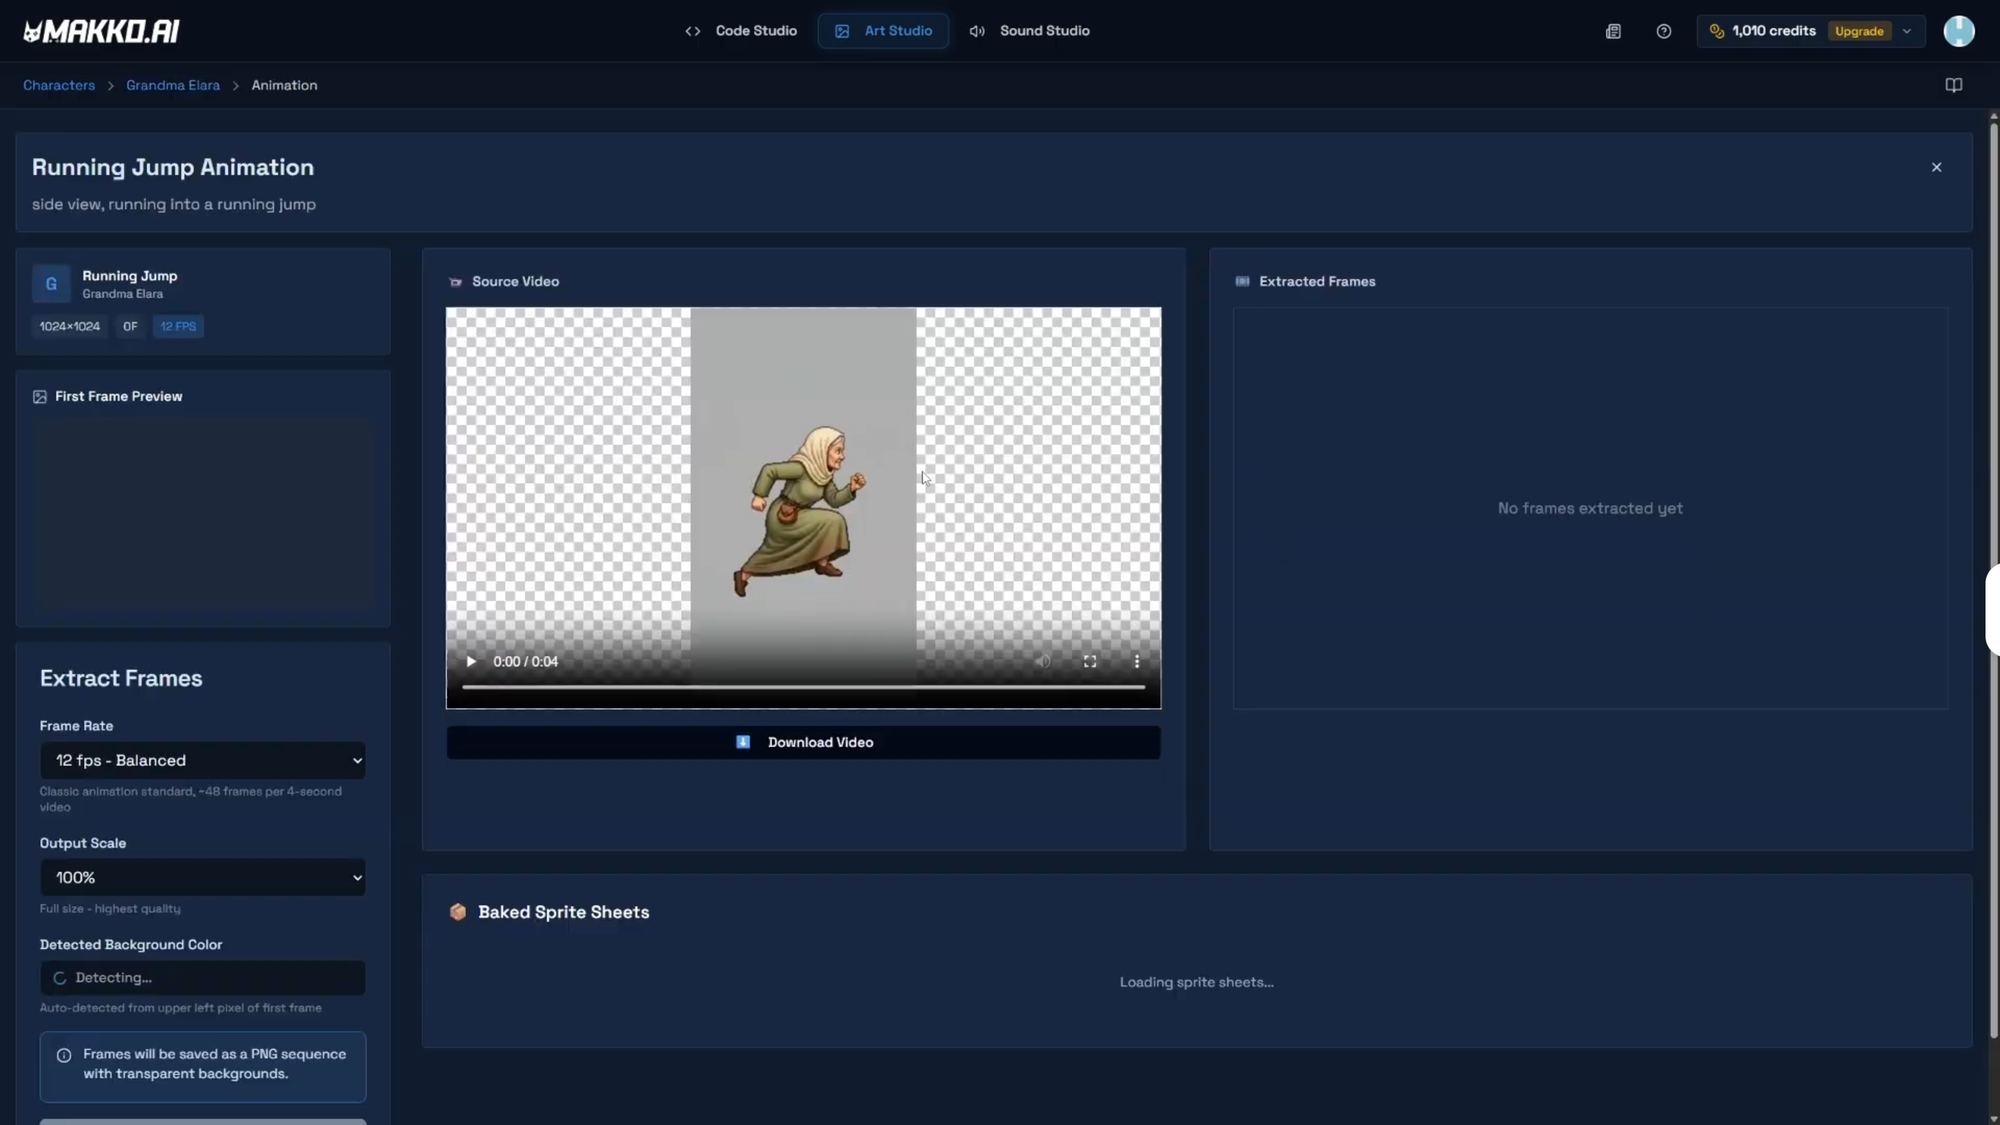
Open the base character's details page in Art Studio. Every animation in this workflow follows the same sequence: choose a frame rate, extract frames, open the Animation Studio, clean the frames, create a sprite sheet.
The Running Jump. Extract frames at the appropriate frame rate for the game's visual style. In the Animation Studio, the raw extraction will include frames that do not belong in the loop: standing frames, landing recovery, transition poses. For the running jump, approximately 35 frames were removed to isolate the 6 frames that captured the exact movement needed. Trim until the loop feels right. Create a new sprite sheet and name it with no spaces: RunningJump works cleanly.
The side view instruction is critical for all platformer animations. The character moves left and right in the game world, so the camera perspective must match. Include "side view" explicitly in every platformer animation prompt. Do not leave orientation to interpretation.
The Run. For a character that carries a weapon and shoots throughout the game, a generic run animation without arm position would look wrong in context. Describe the specific arm placement in the prompt: "side view, running forward with the right arm extended straight in front of the character at all times." This is the distinction between a generic animation and a genre-specific one: the prompt reflects the actual gameplay context, not just the abstract motion.
The run animation is also where you feel the difference between a loop that works and one that does not. A good run loop for a platformer is seamless: you cannot tell where it starts and ends when it plays. Test it repeatedly. If there is a stutter at any point, find that frame and remove it. Clean the loop until it plays without a visible seam.
The Idle and Shooter Stance. Follow the same pattern for the remaining two platformer animations. Extract, clean, create a sprite sheet for each. If an extracted animation does not match what you were looking for, adjust the prompt phrasing and re-extract. Animations that do not work for their intended purpose may still be useful for a different action in this game or a future project: do not discard them automatically. With all four platformer animations complete, the horror platformer's action layer is ready. Four sprite sheets, each representing a specific movement state the game logic will reference during play.
Building the Visual Novel Moveset
With the platformer animations complete, transition to the visual novel's three animations. The workflow is identical: extract, clean in Animation Studio, create a sprite sheet. But the requirements diverge in one critical way: perspective.
In a platformer, the character always faces left or right. Every animation uses a side view. In a visual novel, the convention is different. Characters face directly toward the player during dialogue: forward-facing, as if addressing the reader. This creates direct engagement and allows the character's expression to be visible during extended dialogue sequences. Of the three visual novel animations, two face forward and one faces sideways.
This dual requirement means your prompts need to explicitly specify orientation for each animation. Do not assume the AI will default to the right perspective. State it directly in every prompt.
Walking Forward. This animation faces directly toward the camera. The character's full front is visible. Describe the walk as deliberate and unhurried: visual novel pacing is slower and more expressive than platformer movement. The loop does not need to be as tight as a platformer run because it plays during slower narrative transitions rather than continuous fast movement.
Talking and Gesturing. Also forward-facing. This animation plays most frequently during dialogue sequences, so it needs to feel natural and hold up under repeated viewing. Describe the specific gesture you want: hands open and expressive, a head tilt, a hand raise, rather than leaving it to the AI to interpret generically. The more specific the prompt, the more intentional the result.
Walking Sideways. This animation uses a side view, matching the platformer convention. It will be used during scene transitions or movement within the visual novel's environment. The pace should still be slower than the platformer's run: match the tone of the genre.
One important technical note for forward-facing animations: when these are later brought into Code Studio, the character's anchor point positioning needs to account for the perspective difference. A character rendered from the front has a different spatial relationship to the game world than one rendered from the side. The Alignment Tool in the manifest handles this, and that workflow is covered in the next article in this series.
With all three visual novel animations complete, you now have seven finished sprite sheets across two completely different game genres, all built on the same base character.
Platformer vs Visual Novel: Animation Requirements Compared
| Aspect | Horror Platformer | Visual Novel |
|---|---|---|
| Camera perspective | Side view throughout | Forward-facing (2 of 3), side view (1 of 3) |
| Animation pace | Fast, punchy, responsive | Deliberate, expressive, unhurried |
| Loop priority | Seamless: plays continuously during movement | Natural: plays during transitions and dialogue |
| Key animations | Jump, Run, Idle, Shooter Stance | Walk Forward, Talk and Gesture, Walk Sideways |
| Prompt focus | Physical action, weapon position, momentum | Expression, gesture specificity, orientation |
| Manifest | Separate: platformer animations only | Separate: visual novel animations only |
Building Game-Specific Manifests
With all seven animations complete, the final step in Art Studio is building the manifests. This is where the separation between games actually happens.
From the character details page, open Character Manifest and click the plus icon. For the horror platformer, name the manifest clearly with no spaces: GrandmaElaraHorrorPlatformer works well. Select only the four platformer sprite sheets: running jump, run, idle, shooter stance. Click Create Manifest. This manifest contains everything the platformer needs and nothing it does not.
Repeat for the visual novel. Create a second manifest: GrandmaElaraVisualNovel. Select only the three visual novel sprite sheets: walk forward, talk and gesture, walk sideways. Two manifests. Seven animations. Zero overlap between game builds.
This is asset hygiene in practice. Every animation is created once on the base character. Each game profile references only what it needs through its own manifest. When you later update the character: adding a new animation, refining an existing one, you update the base character once and the manifests reflect the change. You do not maintain separate character files per game and you do not risk one game's build being contaminated by another's assets.
When these manifests are pulled into Code Studio via the Asset Library, the agentic AI reads each one as the complete behavioral definition for that character in that game: what animations exist, what states they represent, and how to wire them to the game logic. The manifest is the bridge between the art pipeline and the game logic layer.
What Comes Next: Scaling and Alignment
The animations are done and the manifests are built. But before a character renders correctly in game, the scale and anchor point of each animation need to be set correctly for the environment it will appear in.
For the horror platformer, the game world is built on a 32x32 pixel grid. If the character animations are not scaled to that grid, they will not render at the right size relative to the environment. For the visual novel, forward-facing animations have different spatial relationships to the game world than side-view ones, and the anchor point needs to reflect that.
The next article in this series covers the scaling and alignment workflow in full: how to use the Alignment Tool in the manifest to position animations correctly for each game environment.
Animation Build Checklist
- Open the base character in Art Studio. All animations for this character are created here. Do not create a new character per game.
- Plan your animation list per game before generating. Know which animations each game needs and what perspective each one requires. Platformer animations are side view. Visual novel dialogue animations are forward-facing.
- Include perspective in every prompt. "Side view" or "facing forward" must appear explicitly. Do not leave orientation for the AI to guess.
- Extract frames and clean every animation in the Animation Studio. Remove standing frames, loop stutters, and transition poses that do not belong in the loop. Do not create a sprite sheet from an uncleaned animation.
- Create one sprite sheet per animation. No spaces in the name. Verify the output before moving on.
- Build a separate manifest per game. Select only the animations that game requires. Do not mix game profiles in a single manifest.
- Name manifests using the charactername_projectname convention. GrandmaElaraHorrorPlatformer and GrandmaElaraVisualNovel are clear examples. Avoid vague names.
- Keep animations that do not work for their intended purpose. They may be useful for a different action in this game or a future project.
Frequently Asked Questions
Can the same character have different animations for different games in Makko?
Yes. All animations are created on the base character in Art Studio. Game-specific manifests then selectively include only the animations needed for each game, keeping each build clean and efficient. One character can have multiple manifests: one per game, each with completely independent settings.
What is a character manifest in Makko?
A manifest is a configuration profile applied to the same base character. It bundles a specific set of animations together so Code Studio knows what animations exist, what states they represent, and how to wire them to the game logic. Each game gets its own manifest with only the animations relevant to that game's genre and mechanics.
How do I make a sprite animation loop cleanly in Makko?
After extracting frames, open the Animation Studio frame editor and remove any frames where the character is standing still or where the motion stutters at the start or end. The Delete, Flip, and Duplicate controls let you work precisely frame by frame. Trim until the loop plays without a visible seam before creating the sprite sheet.
Why do visual novel animations need to face forward rather than sideways?
Forward-facing animations show the character facing the camera directly, which is the standard convention for visual novel dialogue sequences. It creates direct engagement with the player and makes the character's expression visible during extended conversations. Side-view animations: standard for platformers where the character moves left and right, look disconnected and impersonal in a visual novel dialogue context.
Do I need a separate manifest for each game?
Yes. Each game should have its own manifest containing only the animations that game requires. Mixing animations from different game profiles into one manifest can cause incorrect behavior and unnecessarily increases build size. Create all animations on the base character, then attach them selectively to each game's manifest.
For detailed walkthroughs and live feature demos, visit the Makko YouTube channel.
Related Reading
- How to Add Animated Characters to a Game Using Makko
- AI Character Creator vs Sprite Sheets: What's Actually Happening
- Makko Art Studio Props Generator: A Pipeline Efficiency Guide
- State Awareness vs One-Shot Prompts: Why Your AI Game Logic Keeps Breaking
- Visual Novel Tutorial Episode 1: Getting Started With Makko AI
- AI Game Development as a Brick-by-Brick System